History
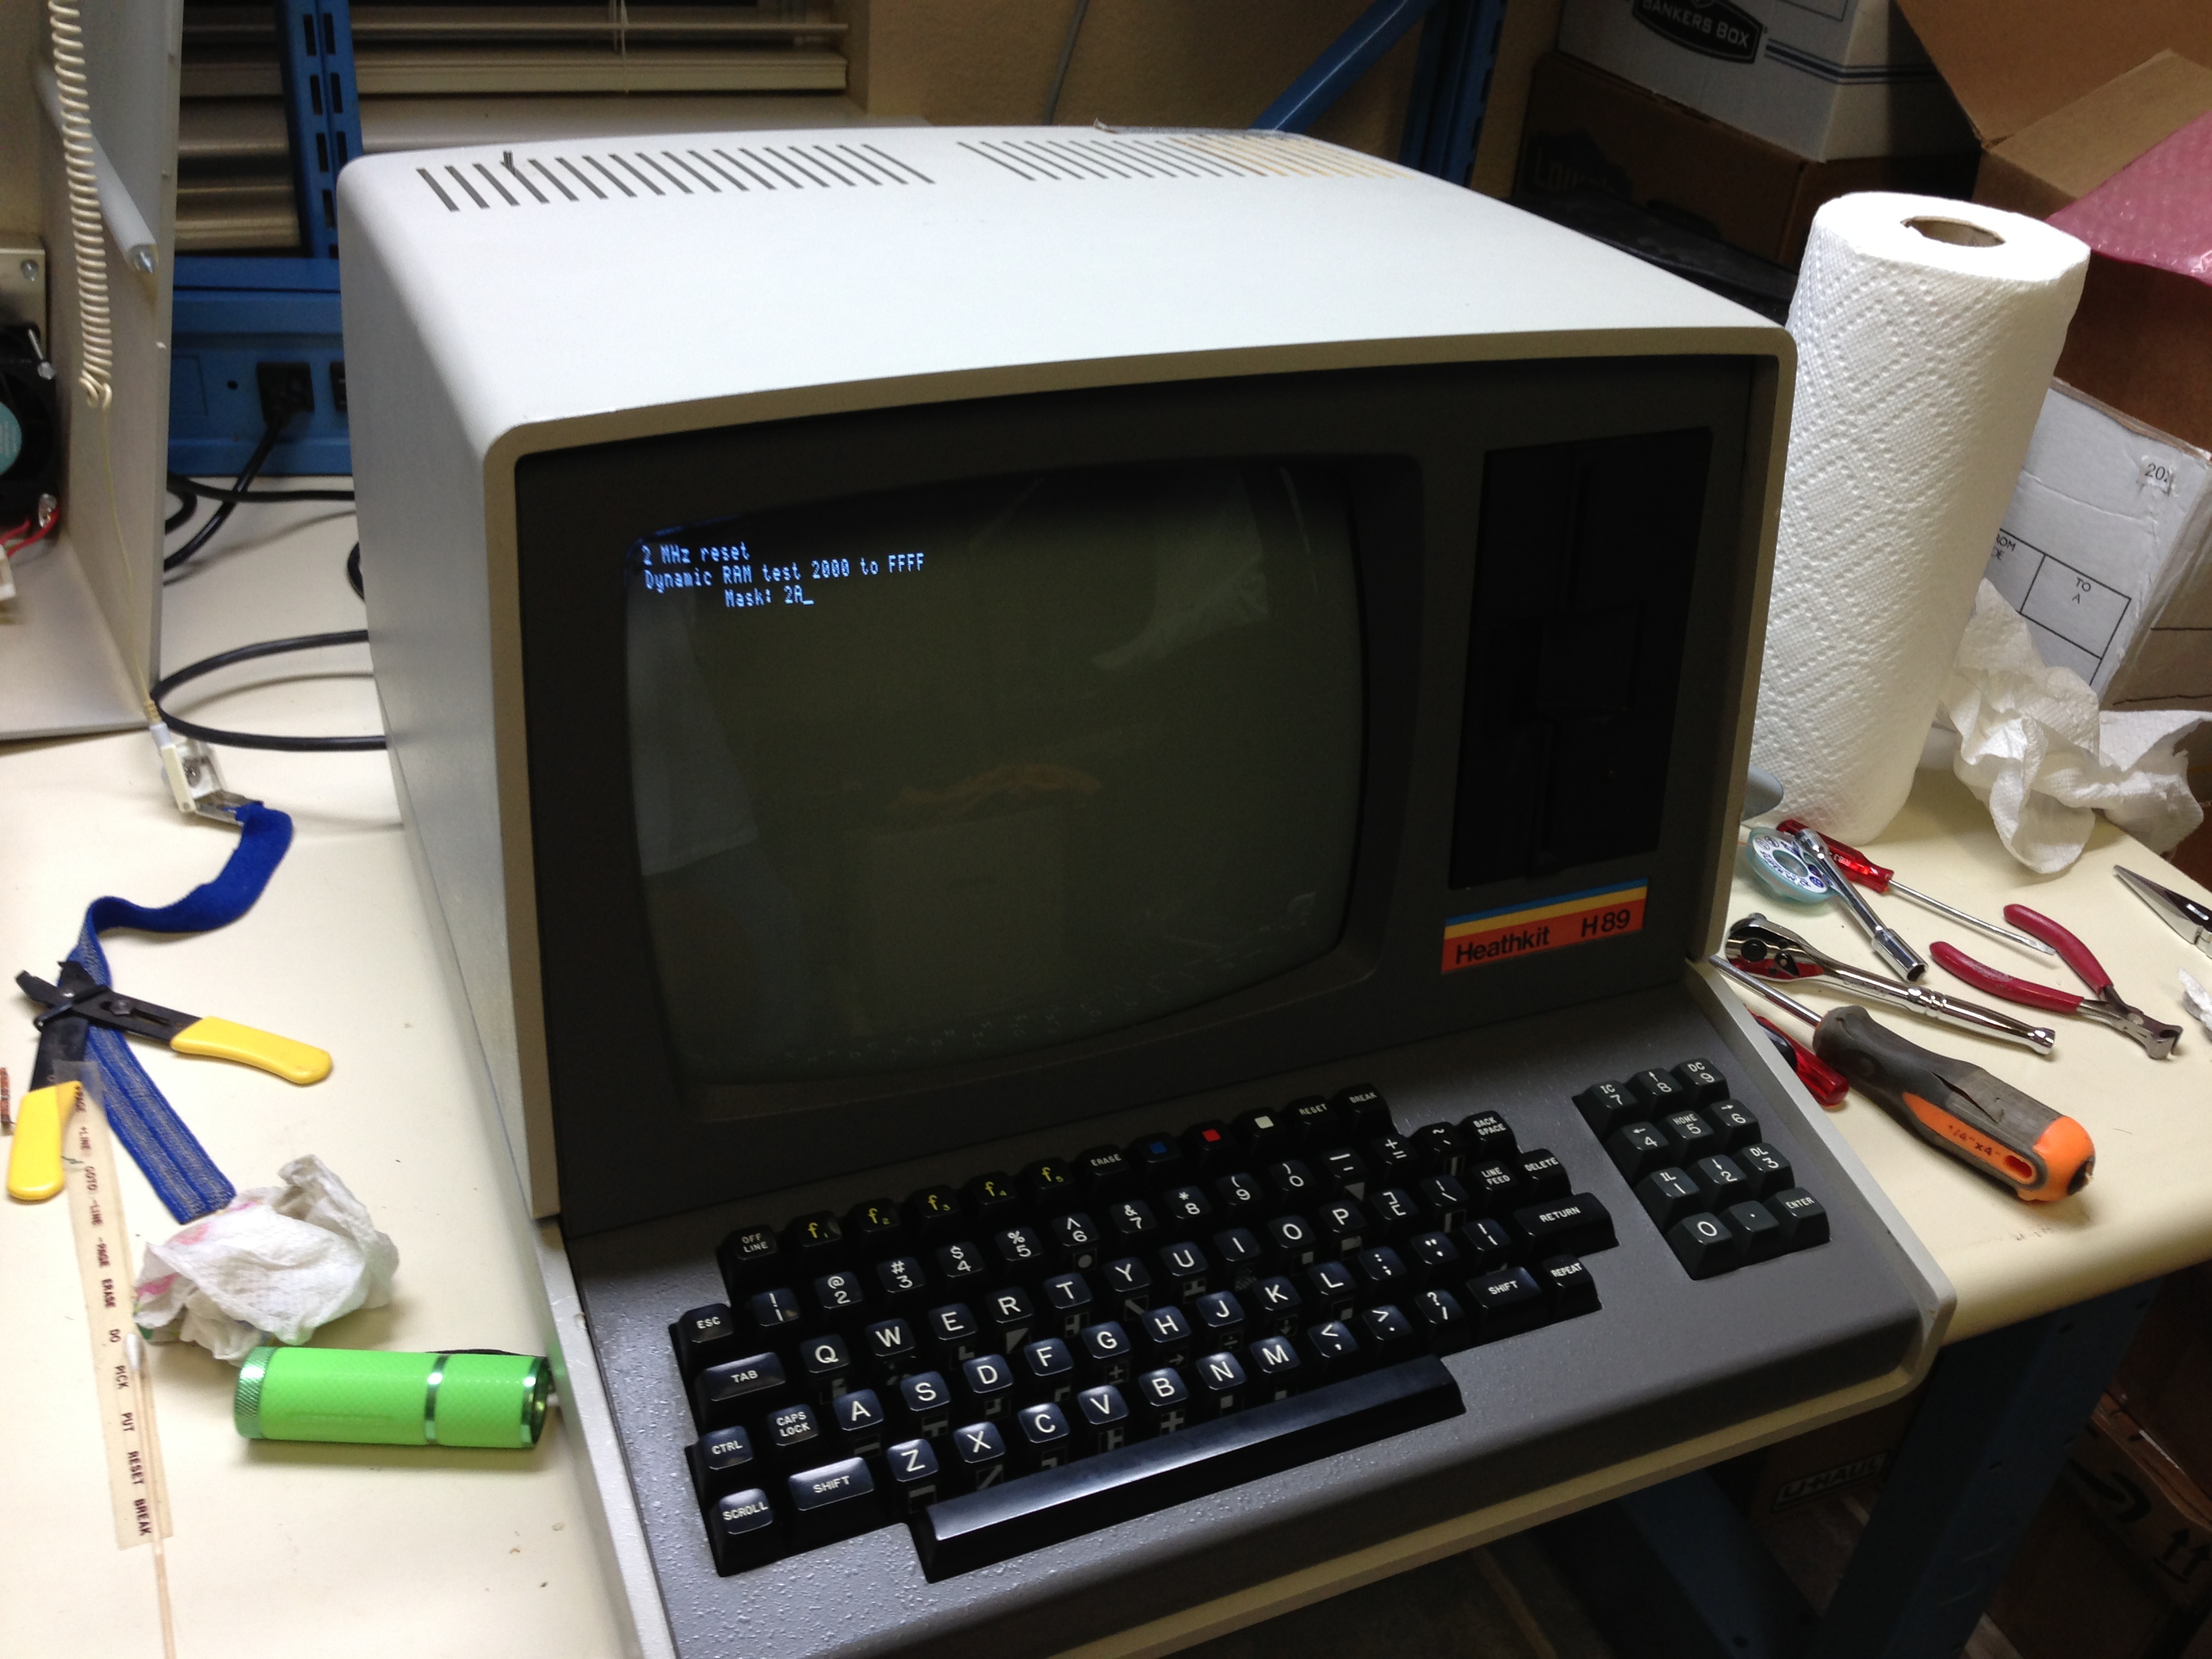
This system was purchased in September 2012 for $200 (including shipping). Although it did not power up, the inside looked very clean (for a 30 year old system) and had several unique boards installed. It also had a modified power supply and large heatsinks for the voltage regulators. Click on any of the pictures for a larger, more detailed image.
Arrival
This system was EXTREMELY well packed. They used double boxing, to insure the system did not directly feel shipping impacts. I should have taken pictures to show the packing, but I was too anxious, and didn't take the time to photograph the packing.
Initial Testing
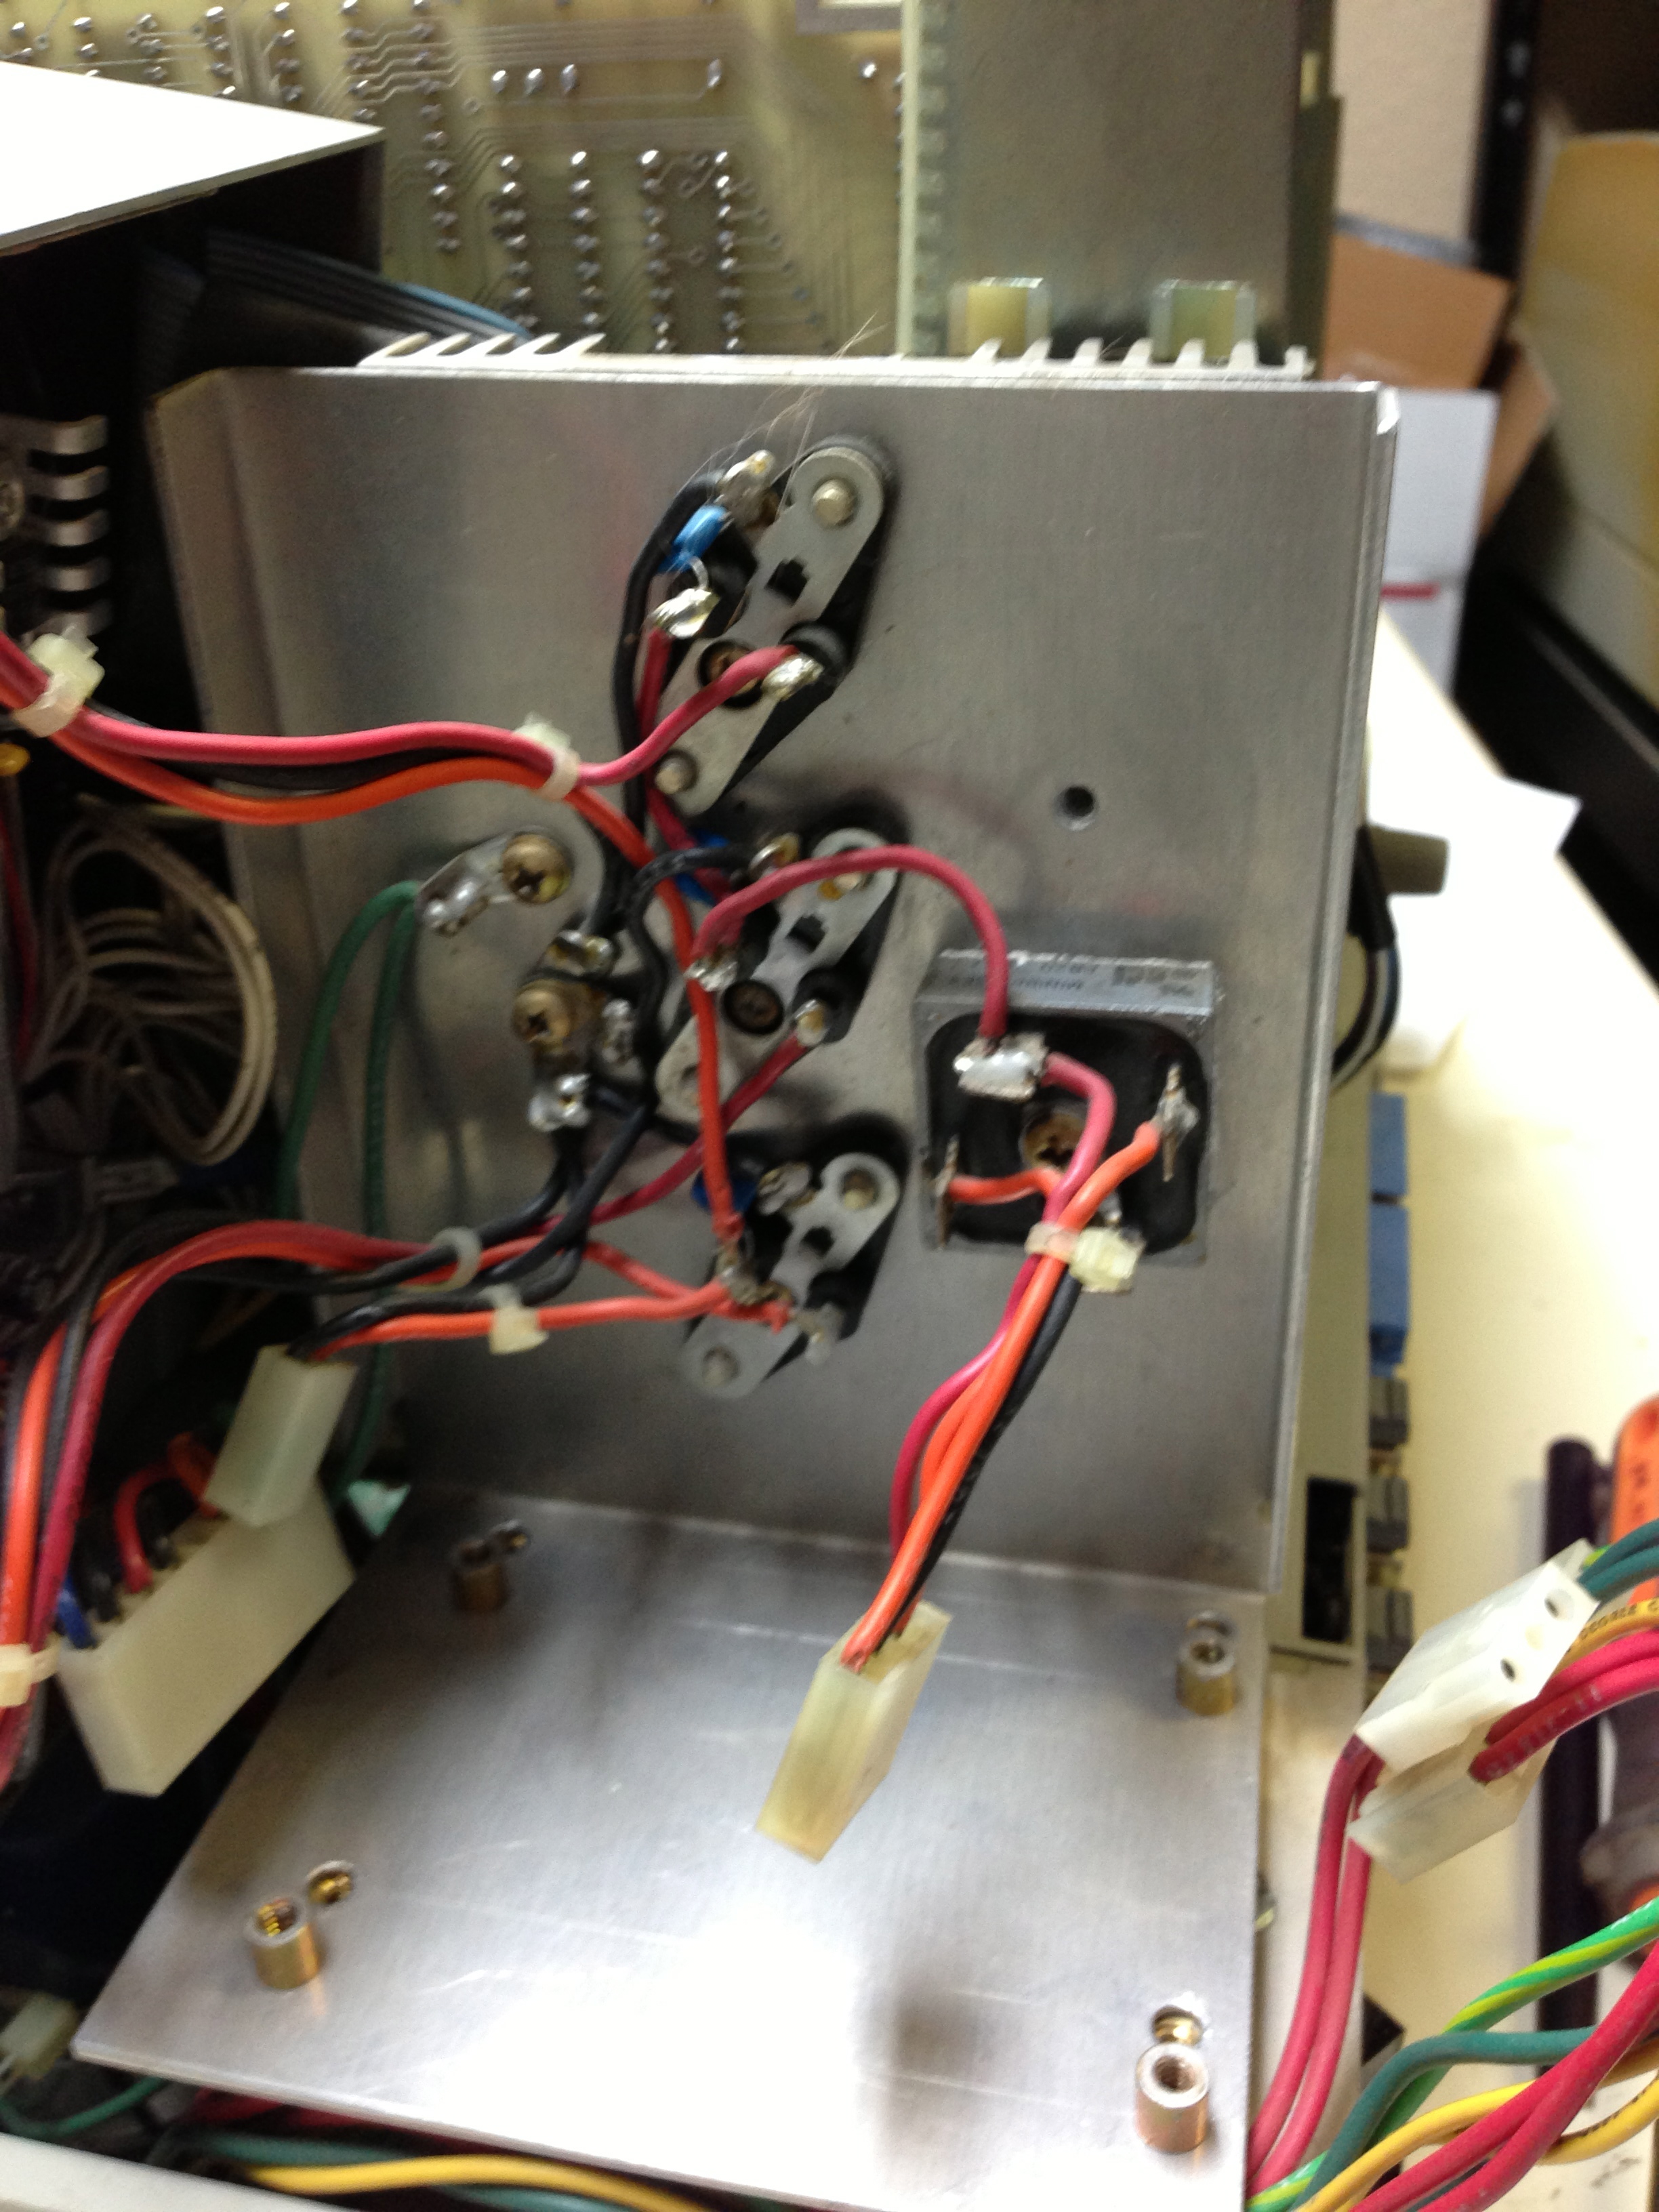
My testing confirmed the information that I had received from the previous owner - although the fuse tested fine, the system was not powering up. After checking the voltages in and around the power supply, I suspected the power switch was bad. After forcefully flipping the switch multiple times, the system came on, but one of the capacitors blew. The capacitor failing is a typical problem with these old systems. I have spare ones to install, but I did not have any spare power switches. After looking on-line, I found some on ebay.
Unique Components
Many parts of this system are unique. See below for pictures and info.
|
Modified power supply - due to the additional power requirements of the custom disk drive controller and MMS (Magnolia MicroSystems) SASI controller, the original owner modified the power supply to have a larger regulator, better heatsinks (connected directly to the cpu/terminal support rails). |
| |
|
|
Magnolia Microsystems (MMS) SASI Controller w/3 Serial Ports - This appears to replace a standard 3 Serial Port in the center of the 3 slots on the right side of the CPU board. (I thought I had a better picture of the board, but this is the best one. When I need to remove boards in the system, I'll try to remember to take a few more pictures of the controller). | |
|
Custom Disk Drive Controller - This drive controller has both a WD2797 chip, typically used for soft-sectored disk drives, and a S2350 chip, which is used on the H-88-1 hard-sectored disk controller. When I have sometime, I'd like to determine if standard software works with this system, or if special drivers are needed. |
| |
 |
Extra heatsink for the power regulators across the top of the CPU board. The original owner must have felt these regulators did not think that the metal top of the CPU board provided enough cooling. Also, as seen on this picture, is a switch at the top left side of the CPU board. This switch extends out through the vents on the top of the cover. It has connections to both of the disk controller boards. In light markings, it has 'H' and 'W' on the top cover. I'm not sure what it means. Another thing I need to investigate. | |
|
64k RAM board. Instead of the normal 3 banks of 16k (48k) on the CPU board, plus a card on the left slot to add the final 16k, this system has a board with 8 64kbit chips to provide the entire 64k without needing 32 memory chips. This should reduce the power requirements. |
| |
|
|
2/4 MHz Upgrade - The original H89 only operated at 2 MHz (really 2.048 MHz), a relatively cheap upgrade was to allow the speed to software-switchable between 2 MHz and 4 MHz. This was done with a small circuit board on the CPU board. In the picture, the speed board is on the top with the three chips. | |
| |
||


System Repairs
|
Once the H89 arrived, I tested the system and verified that the system did not power-up. In checking around the power supply, it appeared that the switch may be bad. After forcibly flipping the switch several times, the system came up, but one of the capacitors blew. I have many extra capacitors, but did not have any extra power switches. After looking on-line, I found some on ebay that would work. |
| |
|
|
After the post office providing a scenic trip for the power switches (NY -> CA -> TX), the parts arrived, but then I had to take everything apart to get to the power switch. | |
|
The terminal board was in fine condition. Some of the chips appeared upgraded, but there doesn't seem to be any major modifications.
|
| |
|
|
After replacing the power switch, the capacitor also needed replacing. The new capacitor is significantly smaller than the original ones, although it is properly rated. The original capacitors on the board appear to be upgrades compared to the standard H89 systems. These are different from the capacitors on my other H89s.
| |
|
Replacing the boards back in the system was harder than normal, due to the cables, and the longer custom disk controller board. But eventually, I was able to get everything was reconnected. The system fired (in a good way) right up. |
| |
|
|
System working, with the 3rd party ROM (MTRHEX 4k), and a white CRT. I also removed the cloth anti-glare screen, which had some dirt under it. If this was a system I had to use daily, I would have kept the anti-glare screen, but by removing it, the system is much cleaner and looks better.
| |
|
|
|
|


Restoration
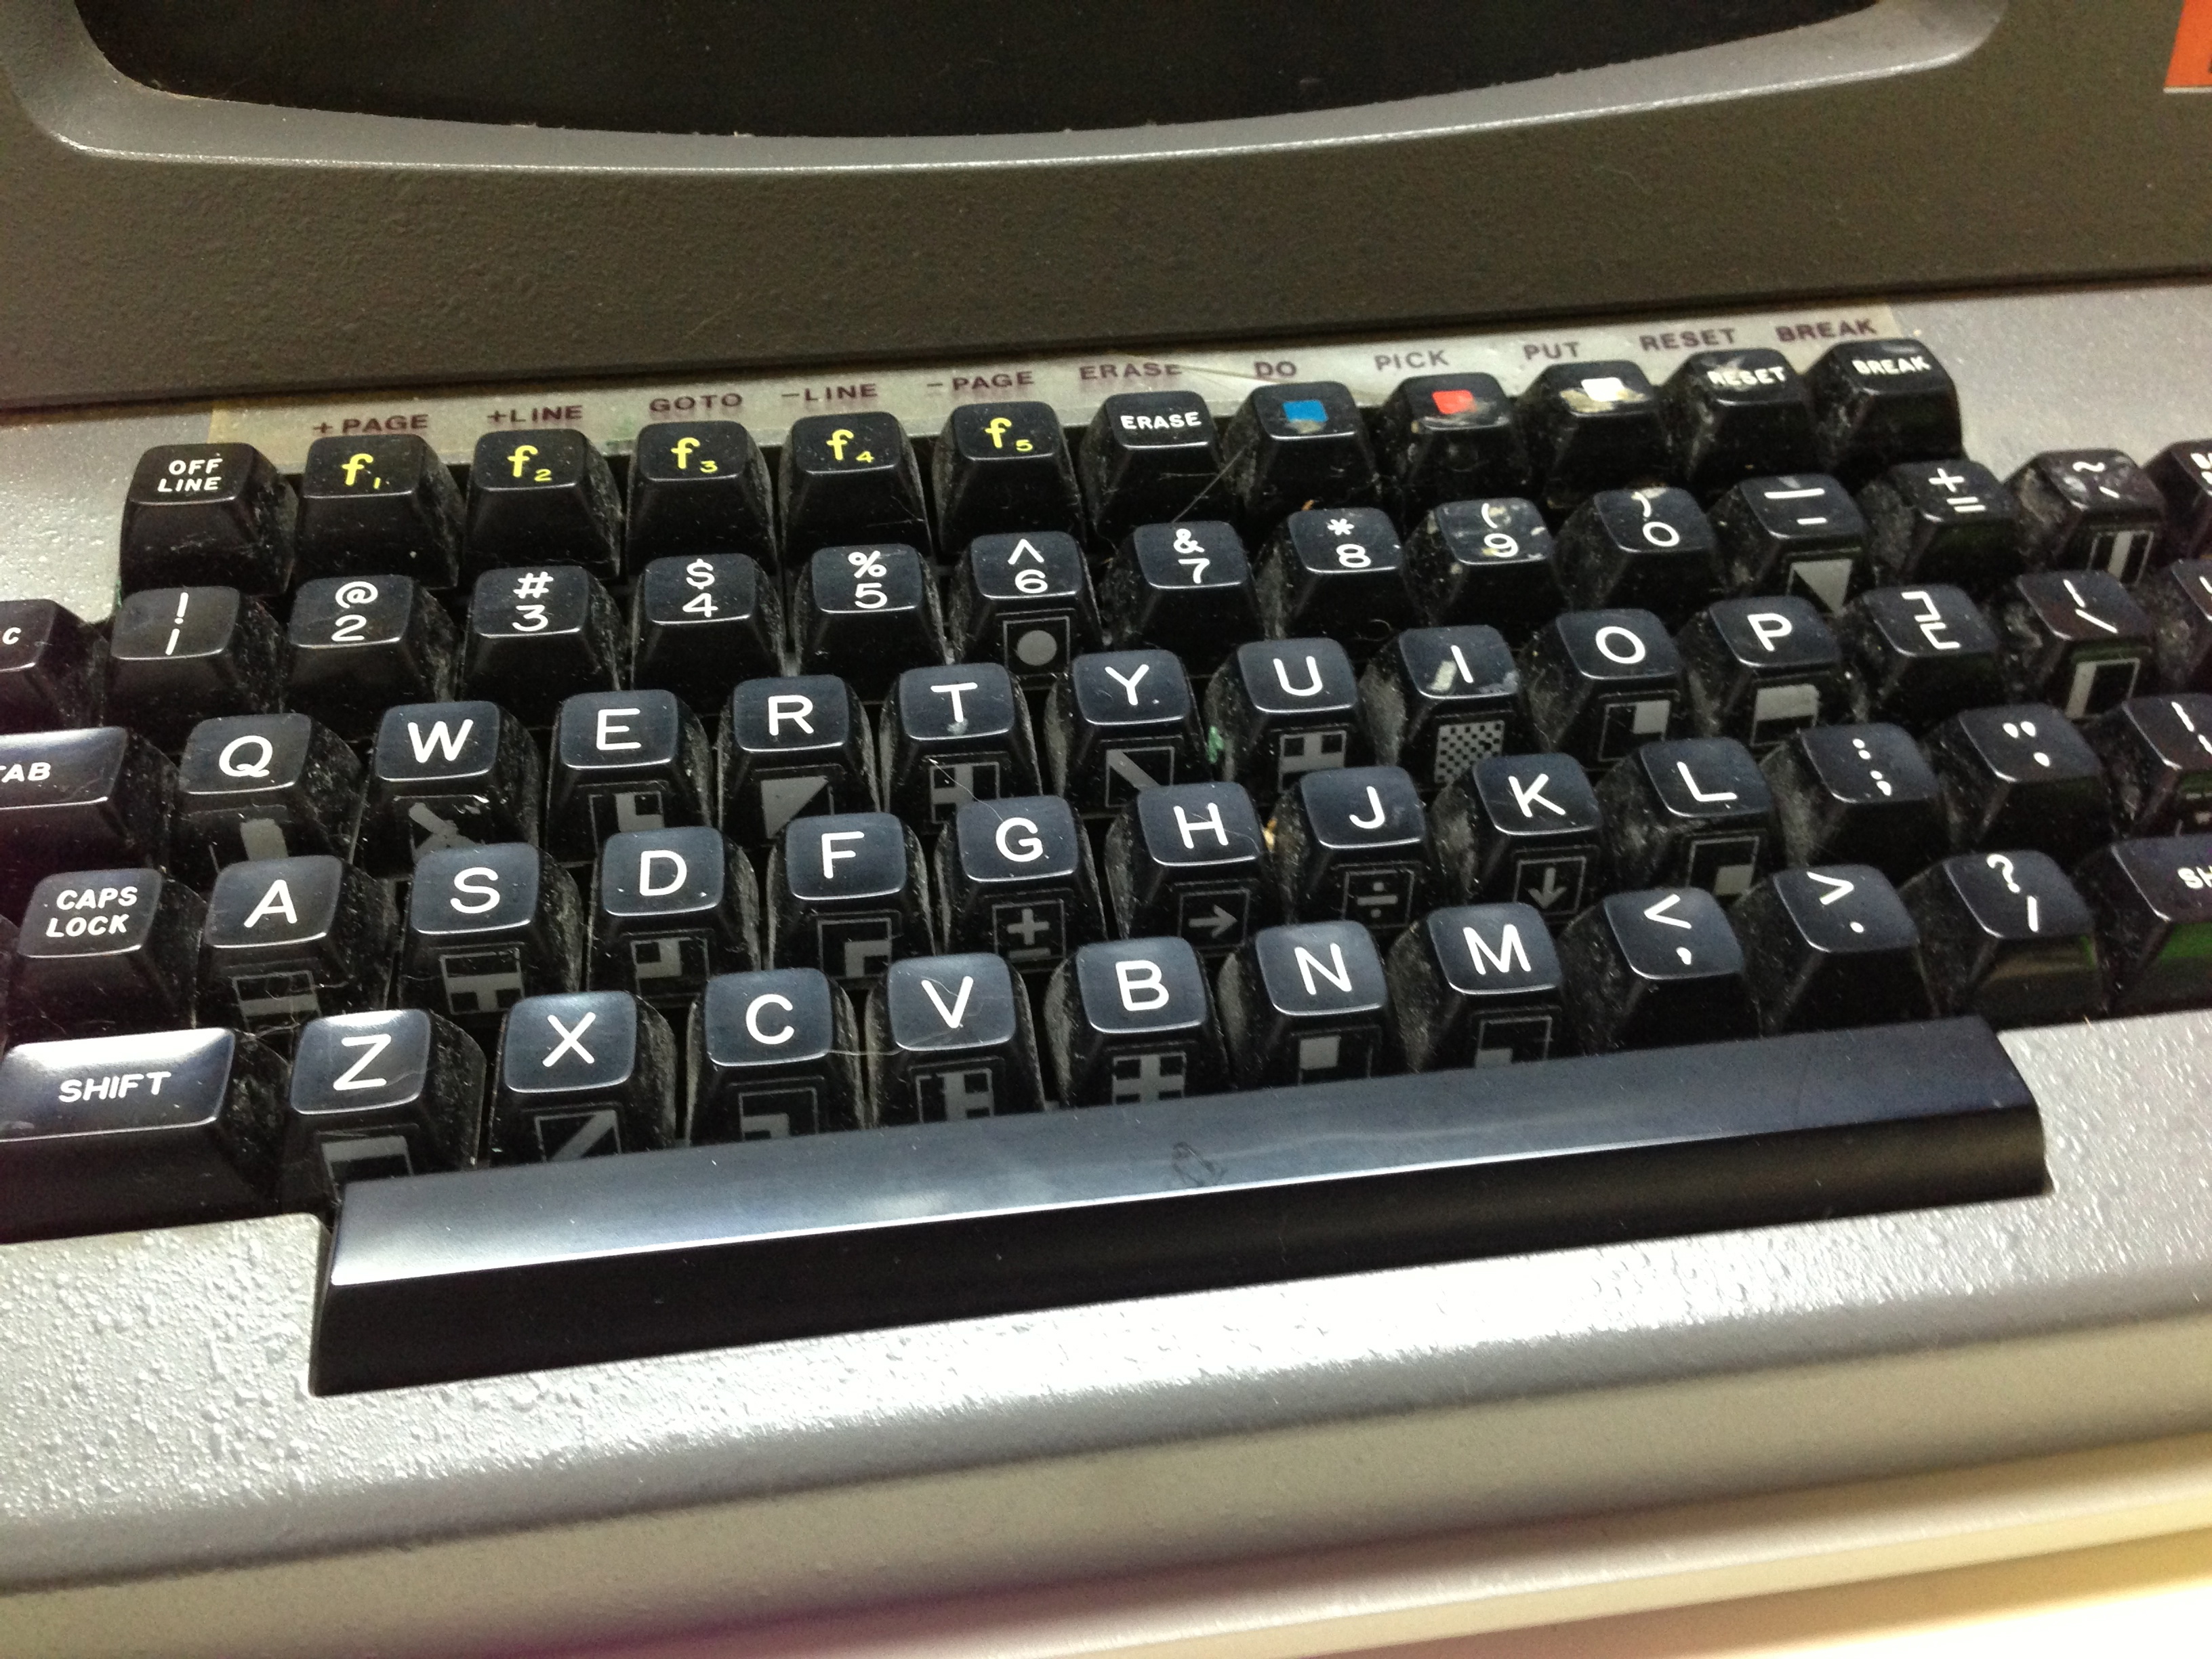
After fixing the functional parts of the system, the next part was to clean it up. Most of the system was very clean for a 30 year old computer. The two areas that needed attention was the keyboard and floppy disk drive. The keyboard was quite dirty and it appeared that something was spilled on it. In the floppy disk drive, I found several pieces of styrofoam peanuts. These need to be removed before use.
|
It was quite apparent that the keyboard required cleaning. The small picture doesn't quite show it, but just click on it for a larger, more detailed picture and you can see how dirty it is. |
| |
|
|
Removing the keyboard is relatively simple. Six screws on the bottom of the case below the keyboard need to be removed. The keyboard then just slides forward, and a single cable needs to be disconnected. Six additional screws keep the keyboard connected to the casing. After removing the case portion, the keyboard along with the circuit board is left. | |
|
Keys are easily removed by pulling straight up. I have cleaned many keyboards. Once I remove the keys, I usually clean them with rubbing alcohol. The alcohol can really dry your hands out, so gloves are recommended. Another unique item I found on this computer was under the <Return> key. Normally, they key is connected only to one connector on the left side of the large key. Depending on use and force, this can cause the plastic to break and leave the <Return> key loose. One of my other systems has this problem. But this keyboard had a plastic black filler in the second connector under the <Return> key. This should make it nearly impossible for the plastic to break. |
| |
|
|
After cleaning and reassembly, the keyboard looked great. Also, this keyboard had stickers for the graphic symbols on the keyboard. I was afraid they would full off with cleaning, but luckily they all stayed on. A few had some of the design rubbed off, but most remained in good condition. None of the pictures of the floppy drive showed the styrofoam peanuts well, but with some pliers and tilting, they were easy to remove. | |
|
Final picture of the system, re-assembled and running the built-in memory test of the ROM. It was on for about 20 minutes without any errors being reported or any other system failures.
|
| |
|
|
|
|


Next Steps
With the system now functional, the next step is to set it up with some additional drives and test it out with software. The key thing is whether or not the software will run with standard drivers, or if additional software drivers, that I don't have, are required.